대표어
대표어


권호기사보기
| 기사명 | 저자명 | 페이지 | 원문 | 기사목차 |
|---|
결과 내 검색
동의어 포함
표제지
국문초록
목차
1. 서론 13
1.1. 연구배경 13
1.2. 연구목적 및 방법 14
2. 암석파괴 기초이론 16
2.1. 정의 16
2.2. 파괴이론의 필수요건 16
2.3. 파괴 및 항복조건식의 종류 17
2.4. 최대주응력설(Maximum principal stress theory) 17
2.5. 최대주변형률설(Maximum principal strain theory) 18
2.6. 최대변형률에너지설(Maximum strain energy theory) 18
2.7. 최대전단응력설(Maximum shear stress theory) 19
2.8. Coulomb의 내부마찰각설(Imternalfriction theory), Coulomb-Navier설, Coulomb-Mohr의 이론, Mohr-Coulomb 이론 20
2.8.1. Coulomb의 파괴기준 20
2.8.2. 최대값 22
2.8.3. 마찰력(Friction force) 23
2.8.4. Coulomb - Navier의 법칙 26
2.9. Griffith의 취성파괴기준(Brittle failure criterion), Griffith의 결함(Griffith crack theory) 30
2.9.1. 용어 30
2.9.2. 응력집중현상 30
2.10. 균열전파 현상의 종류 31
2.11. Crack 속도 33
2.12. 암반의 파괴형태에 영향을 주는 요소 34
3. 국토교통부 기준 35
3.1. 발파암 소할율 기준 35
3.1.1. 2008년 건설공사 표준품셈 35
3.1.2. 2016년 건설공사 표준품셈 35
3.2. 표준발파공법 36
4. 현장개요 및 연구방법 38
4.1. 영상 분석을 위한 현장개요 및 시험방법 38
4.1.1. A현장 시험 지역 38
4.1.2. B현장 시험 지역 47
4.1.3. C현장 시험 지역 53
4.2. 현장별 실측 분석 59
4.2.1. A현장 체거름을 이용한 300㎜이상 파쇄도 비율 분석 59
4.2.2. 체거름 분석현장 일반발파 패턴 61
4.2.3. 체거름 분석현장 대규모발파 패턴 63
4.3. 파쇄도 영상처리 분석기법 65
4.3.1. 영상처리 분석기법 프로그램 65
4.3.2. 프로그램 적용방법 66
5. 분석결과 및 검토 68
5.1. A현장 영상처리에 의한 300㎜이상 파쇄도 비율 분석결과 68
5.1.1. 일반발파 파쇄도 분석결과 68
5.1.2. 대규모발파 파쇄도 분석결과 71
5.2. B현장 영상처리에 의한 300㎜이상 파쇄도 비율 분석결과 74
5.3. C현장 영상처리에 의한 300㎜이상 파쇄도 비율 분석결과 76
5.4. 현장별 영상처리에 의한 300㎜이상 파쇄도 비율 비교분석 78
5.5. 현장별 실측 분석 결과 79
5.5.1. A현장 일반발파 체거름에 의한 300㎜이상 파쇄도 비율 분석결과 79
5.5.2. A현장 대규모발파 체거름에 의한 300㎜이상 파쇄도 비율 분석결과 81
5.5.3. 현장별 300㎜이상 파쇄도 평균비율 실측 분석 비교 83
5.6. 300㎜이상 파쇄도 평균비율 영상처리 분석과 실측치 비교 84
5.6.1. 히스토그램을 이용한 비교분석 84
5.6.2. 회귀분석을 통한 비교분석 86
5.7. 현장별 t-test 88
6. 결론 90
참고문헌 93
부록 96
Abstract 183
Fig. 1. Yield condition of the maximum normal stress... 18
Fig. 2. Failure criteria of the maximum shear stress theory 20
Fig. 3. Stress equilibrium of the inclined plane 21
Fig. 4. Stress variation due to the inclination angle 23
Fig. 5. Definition of the friction force 25
Fig. 6. Stress on the fracture surface 25
Fig. 7. Coulomb's law 28
Fig. 8. Types of τ-σ relationship 28
Fig. 9. Griffith's crack for planar compression 32
Fig. 10. Griffith's crack model 33
Fig. 11. Standard pattern for normal blasting 37
Fig. 12. Standard pattern for massive surface blasting 37
Fig. 13. Location of Site A 38
Fig. 14. Geological map of Site A 39
Fig. 15. Joints of Site A 41
Fig. 16. Pattern for normal blasting of Site A 43
Fig. 17. Pattern for massive surface blasting of Site A 46
Fig. 18. Location of Site B 47
Fig. 19. Geological map of Site B 48
Fig. 20. Joints of Site B 50
Fig. 21. Pattern for massive surface blasting of Site B 52
Fig. 22. Location of Site C 53
Fig. 23. Geological map of Site C 54
Fig. 24. Joints of Site C 56
Fig. 25. Pattern for massive surface blasting of Site C 58
Fig. 26. Sieving screen at blasting rate 59
Fig. 27. Procedure for fragmentation analysis by site sieving 60
Fig. 28. Normal blasting Site A, site sieving performed 62
Fig. 29. Massive surface blasting Site A, site sieving performed 64
Fig. 30. Digital image processing by Split Desktop Version 2.0 67
Fig. 31. Distribution of plus 300㎜ fraction rate of normal blasting by... 70
Fig. 32. Histogram and cumulative probability plot plus 300㎜ fraction... 70
Fig. 33. Distribution of plus 300㎜ fraction rate of massive surface... 73
Fig. 34. Histogram and cumulative probability plot plus 300㎜ fraction... 73
Fig. 35. Distribution of plus 300㎜ fraction rate of massive surface... 75
Fig. 36. Histogram and cumulative probability plot plus 300㎜ fraction... 75
Fig. 37. Distribution of plus 300㎜ fraction rate of massive surface... 77
Fig. 38. Histogram and cumulative probability plot plus 300㎜ fraction... 77
Fig. 39. Comparison histogram of plus 300㎜ fraction rate by image... 79
Fig. 40. Distribution of plus 300㎜ fraction rate of normal blasting by... 80
Fig. 41. Histogram and cumulative probability plot plus 300㎜ fraction... 80
Fig. 42. Distribution of plus 300㎜ fraction rate of massive surface... 82
Fig. 43. Histogram and cumulative probability plot plus 300㎜ fraction... 82
Fig. 44. Distribution of plus 300㎜ fraction rate of surface blasting by... 83
Fig. 45. Histogram and cumulative probability plot plus 300㎜ fraction... 84
Fig. 46. Histogram of overall measurement summary by Sites 85
Fig. 47. Linear relationship between image processing and overall measurement 87
발파를 시행하는 공사현장에서 발파 후 파쇄암이 불규칙적인 크기로 생성되며, 이를 일정 크기로 만들기 위서는 일반적으로 2차적인 소할작업이 이루어지고 있다. 그러나 많은 발파현장에서는 소할작업 대상량의 결정에 대한 많은 문제가 발생하고 있어 이를 해결하기 위한 방안의 제시가 필요하다.
국내 소할율 기준은 국토교통부의 기준에 의해 표준품셈에 명시하고 있으나, 모든 현장에 동일하게 300mm이상 파쇄석의 15%만을 소할대상으로 규정하고 있다. 그러나 국내 발파 현장에서는 암석의 역학적 성질과 발파 조건의 상이성으로 인하여 대부분 15%보다 높은 소할율을 보임에 따라 소할율 기준의 적정성에 대한 연구가 필요하다.
본 논문에서는 3개의 대규모 노천발파 현장을 연구 대상으로 하였으며 300mm이상 파쇄도 비율을 분석을 위하여 영상처리기법 및 체거름 측정법과 현장 관례적 방법으로 조사한 결과를 비교 분석하였다.
연구결과 소할작업 대상량은 모든 현장에서 국토교통부의 소할율 기준인 15%보다 높게 나타났다. 영상분석과 체거름 분석에 따른 300mm이상 파쇄도 비율은 각각 26~41%와 23~44%로 나타났으며 현장의 관례적 방법에 따른 결과도 37~44%로 높게 나타났다.*표시는 필수 입력사항입니다.
| 전화번호 |
|---|
| 기사명 | 저자명 | 페이지 | 원문 | 기사목차 |
|---|
| 번호 | 발행일자 | 권호명 | 제본정보 | 자료실 | 원문 | 신청 페이지 |
|---|
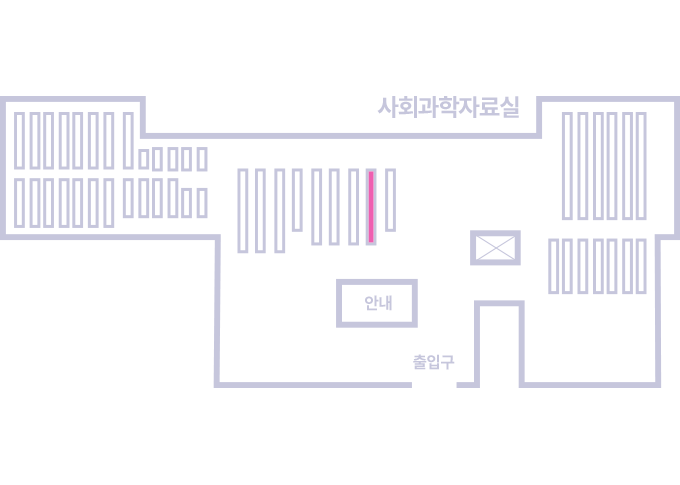
도서위치안내: / 서가번호:
우편복사 목록담기를 완료하였습니다.
*표시는 필수 입력사항입니다.
저장 되었습니다.